To reach the Reports Menu:
The Reports Menu can be accessed by clicking the Reports icon on the Action Bar:
OR
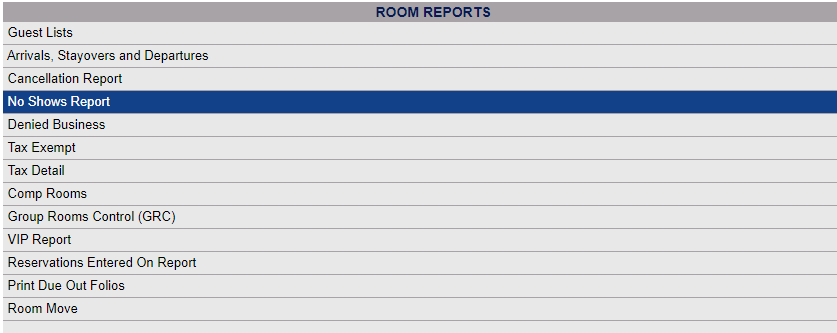
The Reports screen is divided into four sections, Room Reports, Revenue Reports, Managers Reports and Other Reports.
The No Shows Report command is in the Room Reports section.
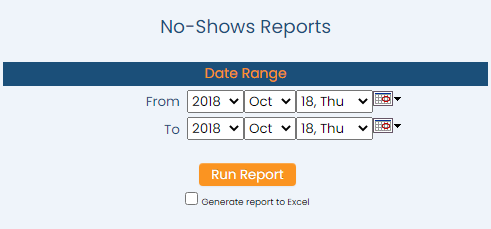
When selected, the No Shows Report screen will open.
Date Range: You will need to specify the Date Range for the Report. This range identifies the dates for which a stay status was changed from RESV to NSHO.
From: Use the drop-down menus or the calendar icon to select the Date you wish to have the reporting begin for the report. By default the Date selected is today's Date.
To: Use the drop-down menus or the calendar icon to select the Date you wish to have the reporting end for the report. By default the Date selected is today's Date.
When finished, click the orange button Show Report.
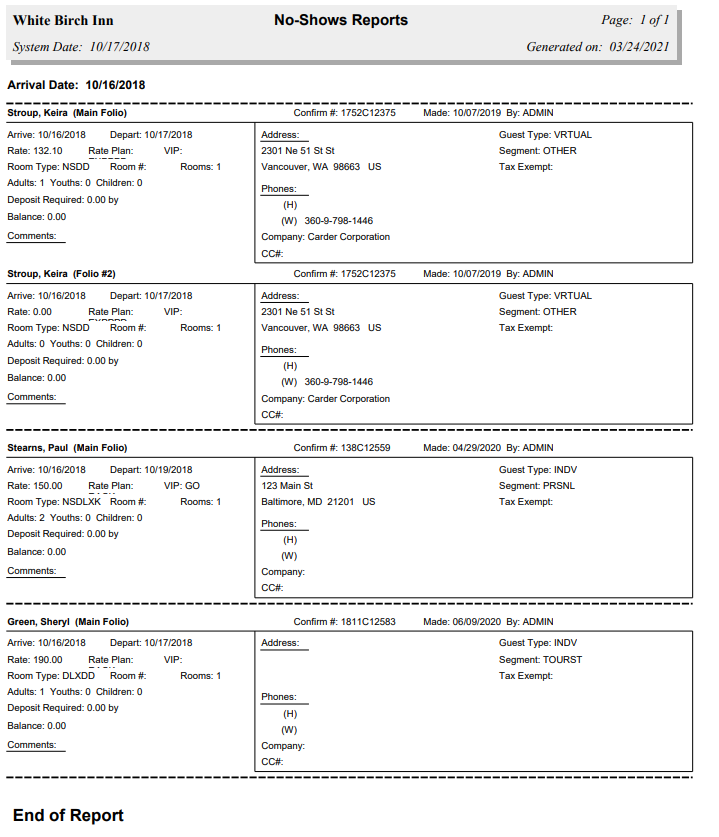
When generated the report shows a very detailed list of the information for each No Show, including the guest name and confirmation number, expected arrival and departure dates, rate, rate plan, VIP status, room type, room number, number of rooms and Adults/Children/Youths, deposit information, any comments, and the guest address and phone information, guest type and segment, and if there is one the company associated with the no show.
By default, the report is generated in PDF form and opens in a separate browser window. From there you can select to save or print the report, among other options. You can, instead, check the Generate report to excel checkbox to generate the report in HTML for downloading to Excel instead of PDF. The information in this case will then be correct for importing into another document rather than immediate viewing.
NOTE: The generated report appears as a pop-up window through your browser. If your browser is set to block pop-ups, you may receive a warning banner at the top of the browser. Click this banner and select to allow pop-ups so that you can view the report.


